Shopify Mobile Case Design
- Made By: SolverCircle Ltd
- email: shopify@solvercircle.com
- Website:www.solvercircle.com
Thank you for purchasing our "Shopify Mobile Case Design" Apps. If you have any questions that are beyond the scope of this help file, please feel free to email via our user page contact form. Thank you so much!
Introduction
“Shopify Mobile Case Design” app is used to Design or Personalized your own case & covers for any Mobile, Tab or any Cell Phone. By this app customer can design the mobile case as per their need such as add image from Facebook, Instagram or upload from computer or any other devices.
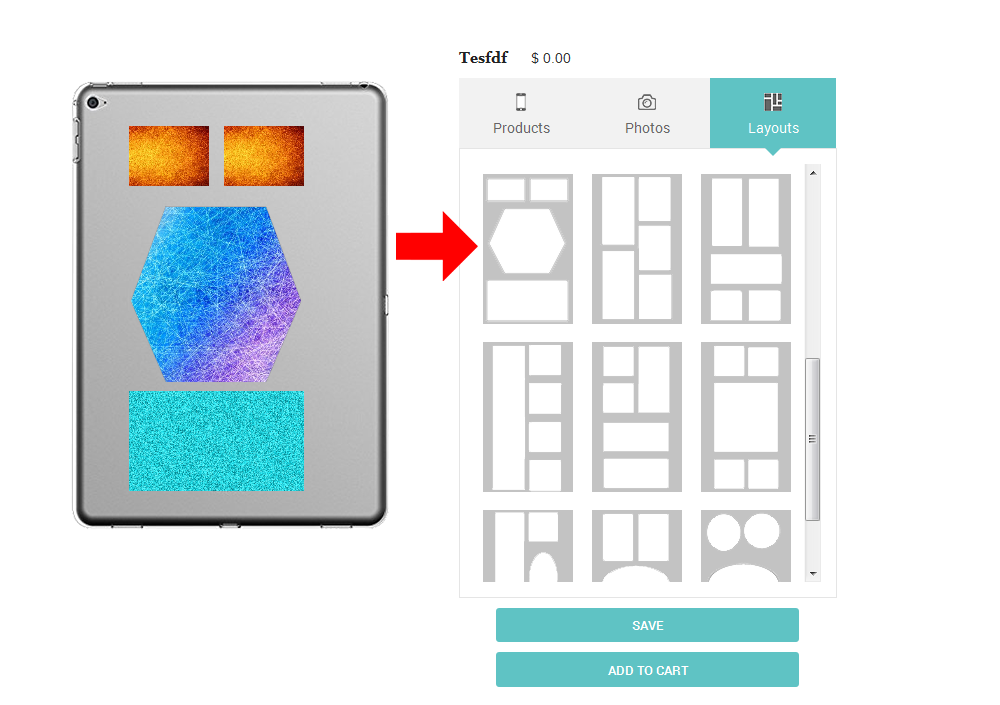
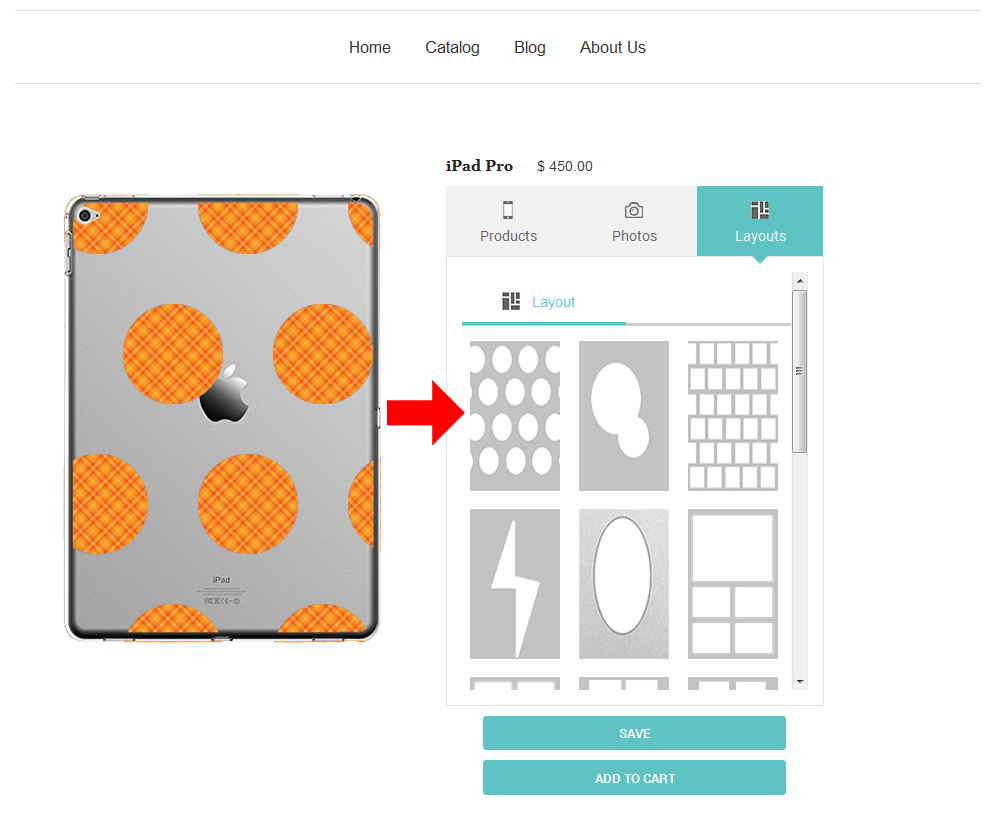
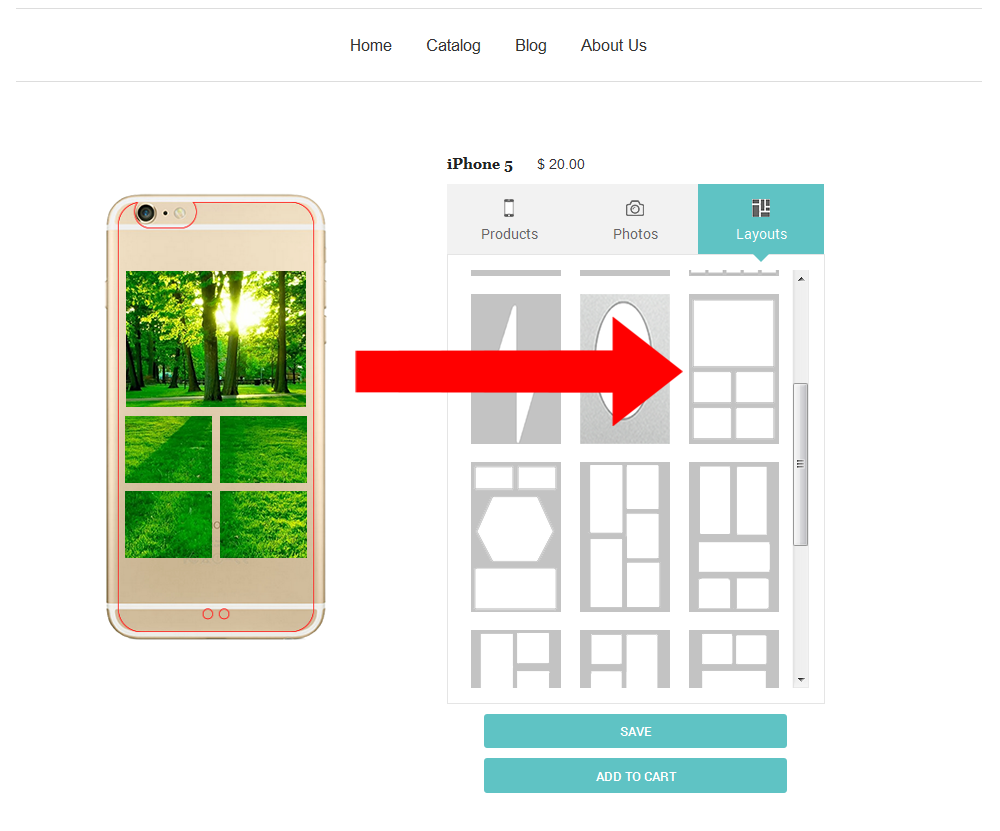
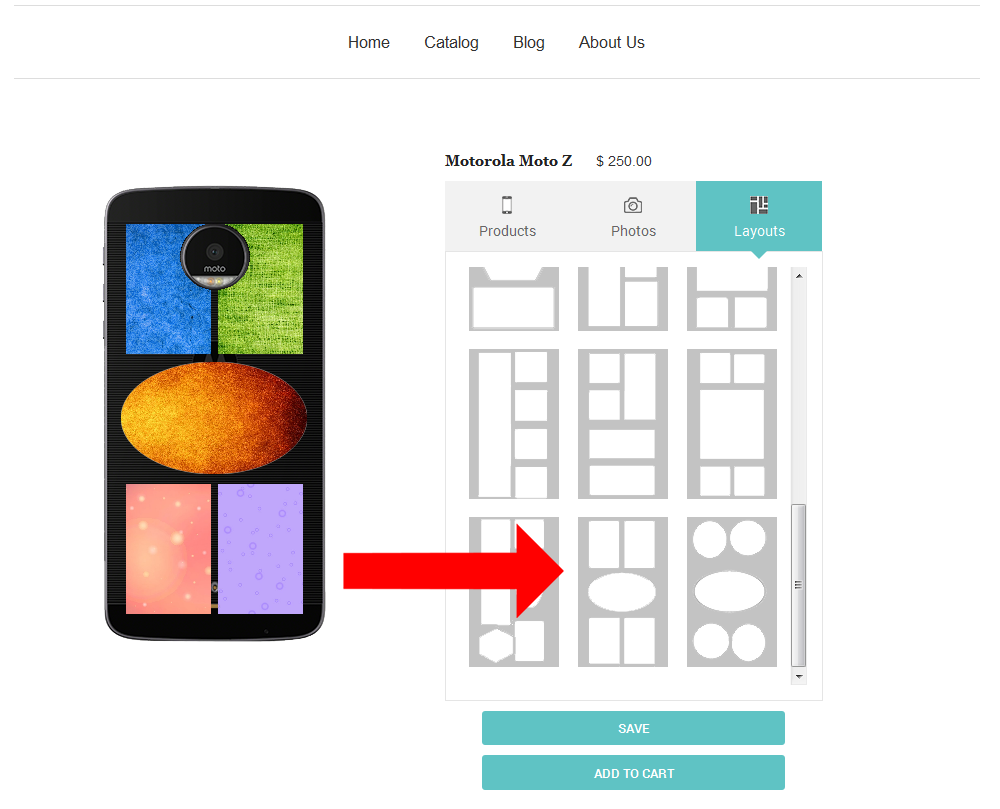
Customer can choose varieties of Layouts to design on mobile case and image or logo will show only the Layout portion of mobile case. That is a unique feature of this app.
Customers are able to design their own mobile cases or any devices and this is easy way to design from online. Just choose a product and select Layout then upload image from Facebook, Instagram or your device.
“Shopify Mobile Case Design” module has some excellent features and very easy to setup.
“Shopify Mobile Case Design” module is more flexible and compatible with many existing modules in the Shopify repository. This Module is fully customizable. Users can easily configure the module into the new or existing Shopify websites.
Features
- Shoppers can upload their own ClipArt/Design/Image/Logo from Facebook, Instagram or any other devices to print on mobile while shopping.
- Just click on “Design It” button and start design.
- Shoppers can choose varieties of Layouts to design on mobile case.
- Insert multiple logo image and move at any position of the mobile case. Just drag the image on layout.
- Shoppers can add to cart the product from design panel.
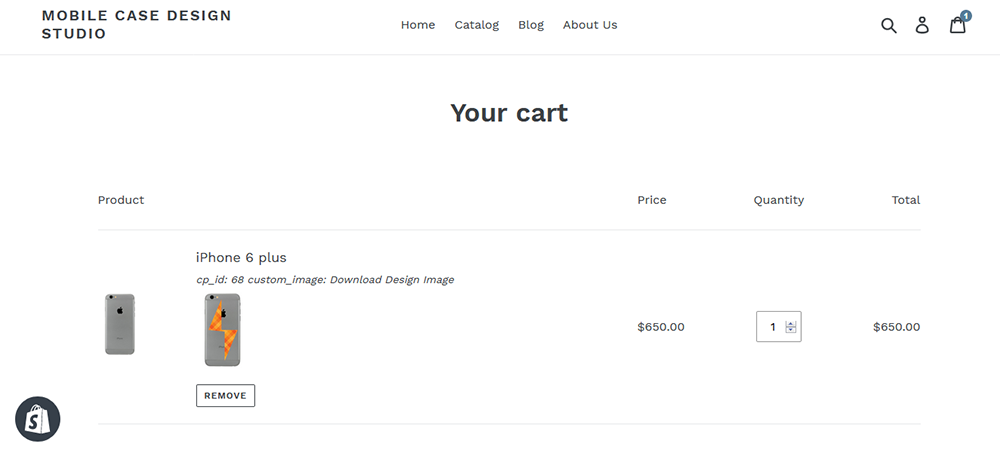
- Download your design image from cart page.
- Shop owner can upload mobile image from "Customized Cases" link of apps admin.
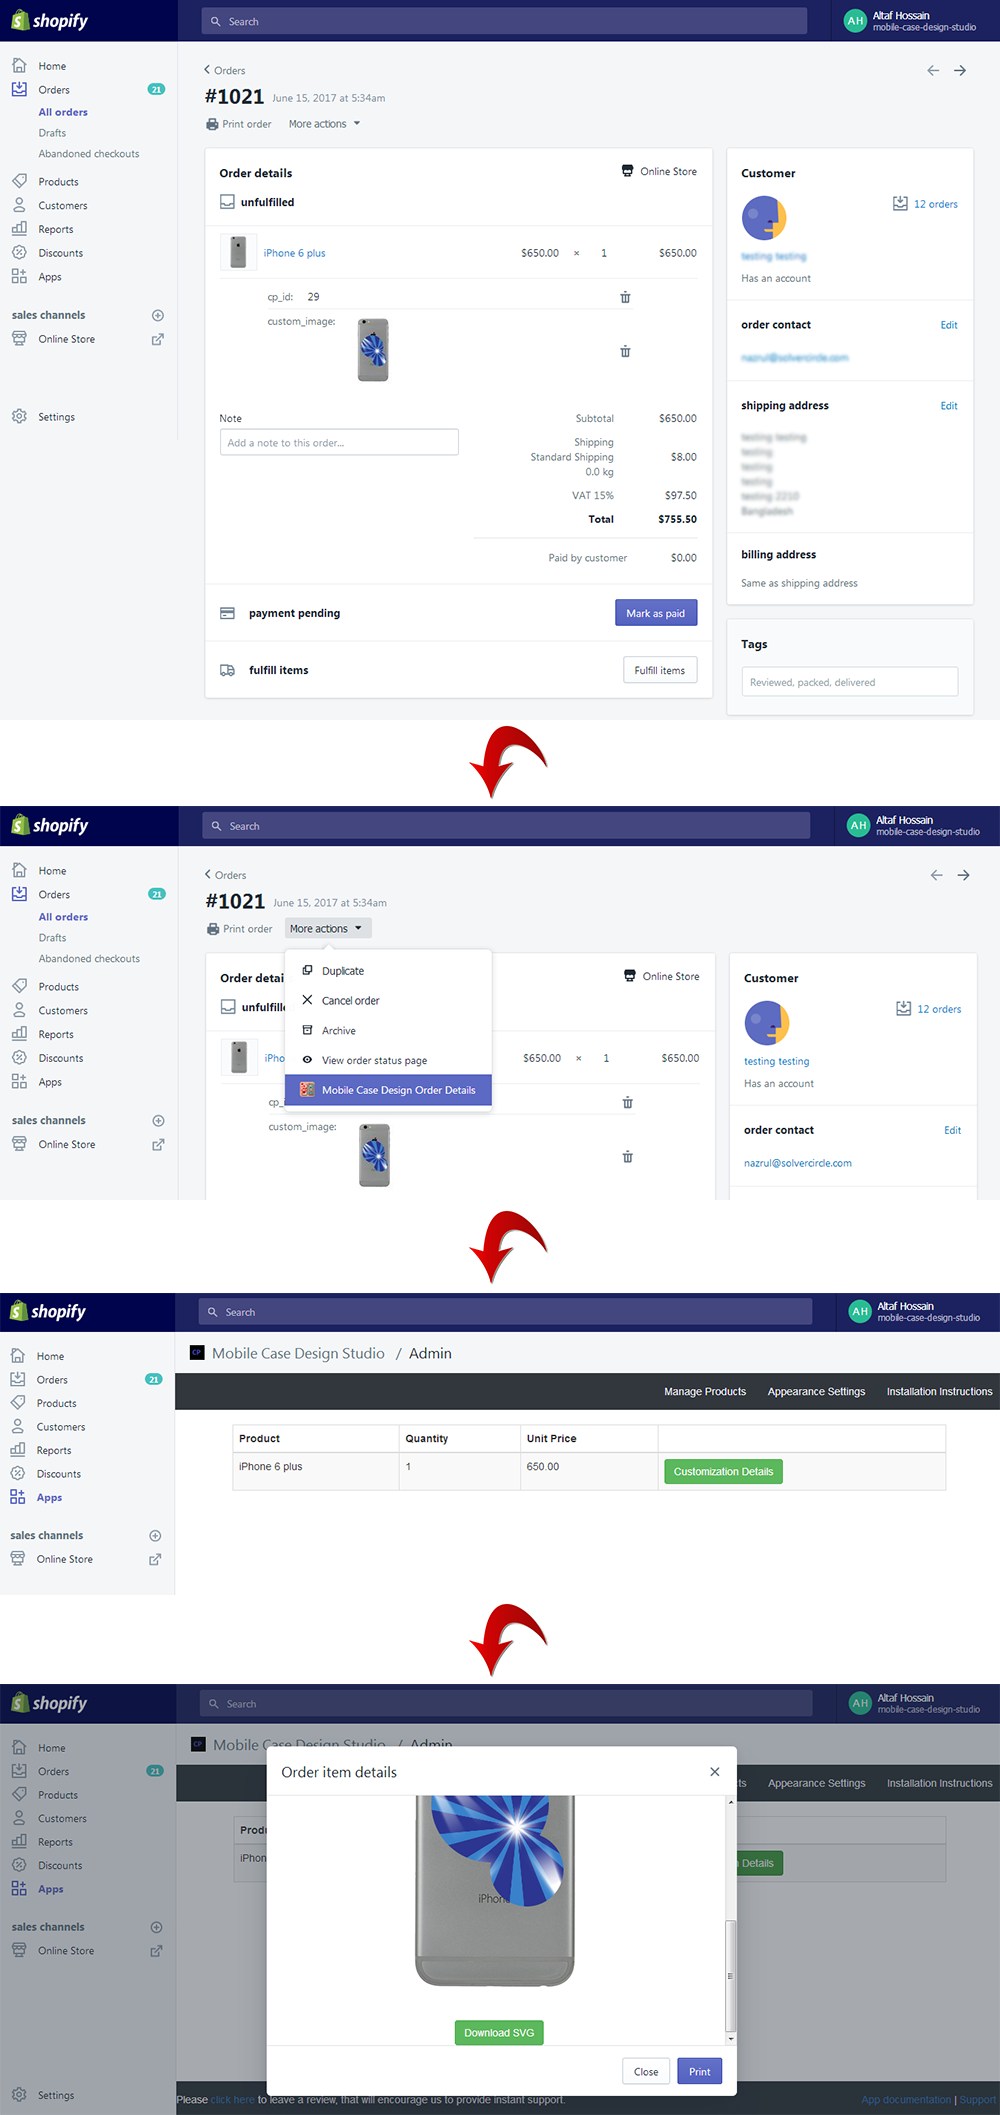
- Download your design from order details option of apps admin.
Advanced Installation Tips
This section will cover the guideline about manual installation that requires some theme liquid changes. If your app does not work as expected after the installation or you want to implement more improvements then you can try manual installation to fix those issues.
1. Login your Shopify Store in Admin panel.
2. Now hit our Apps URL and click on to Get button.
3. Install the Mobile Case Design Studio app.
Manual installation processes are given below.
4. Go to Themes menu of Admin Dashboard and Edit code of your published themes to install the app.
5. Click on Template Editor and put the Shopify Mobile Case Design App code in the following files.
Step 1: For manual installation go to sc-mcd-btn-loader-150812.liquid this file and change mcd_install_type = 'auto' this code to mcd_install_type = 'manual'.
Screenshots of theme file for the Step 1 code is given below:

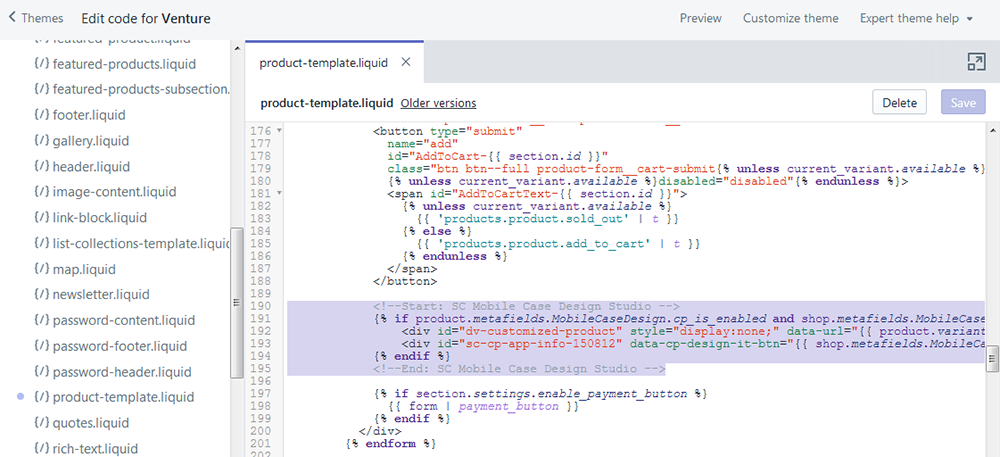
Step 2: Now add the following code into product-template.liquid file where you want to show the mobile case design's Design It button like as below screenshot.
	<!--Start: SC Mobile Case Design Studio -->
	{% if product.metafields.MobileCaseDesign.cp_is_enabled and shop.metafields.MobileCaseDesign.cp_design_it_btn %}
		   <div id="dv-customized-product" style="display:none;" data-url="{{ product.variants.first.id }}" ></div>
		   <div id="sc-cp-app-info-150812" data-cp-design-it-btn="{{ shop.metafields.MobileCaseDesign.cp_design_it_btn }}" ></div>
	{% endif %}
	<!--End: SC Mobile Case Design Studio -->
Screenshots of theme file for the Step 2 code is given below:
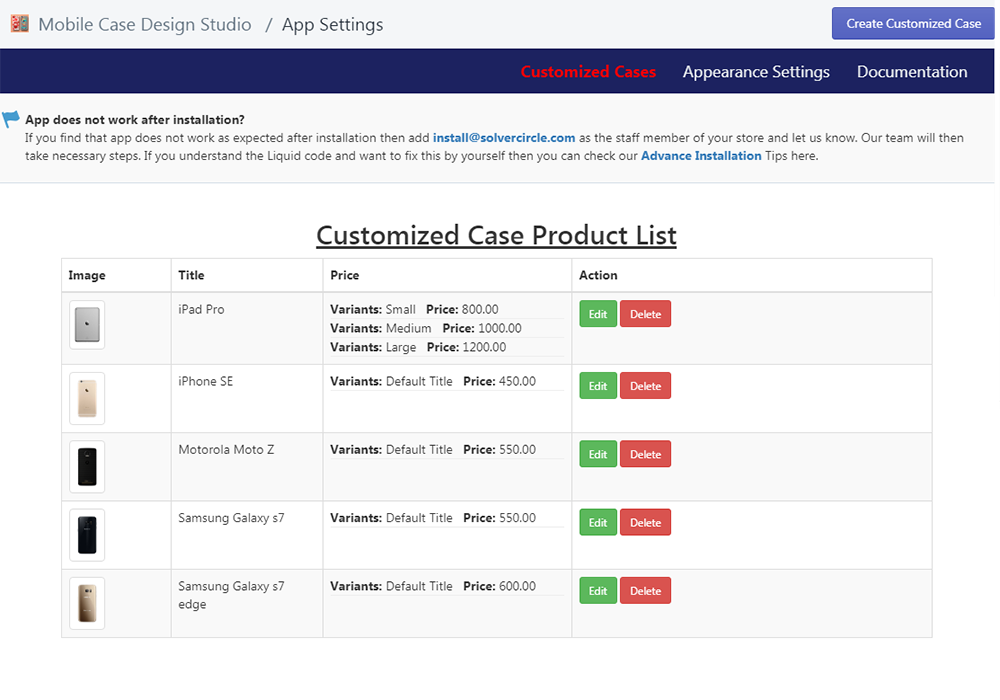
6. So your app has installed. Now go to Apps menu of Admin Dashboard and click on the Mobile Case Design Studio Apps link.
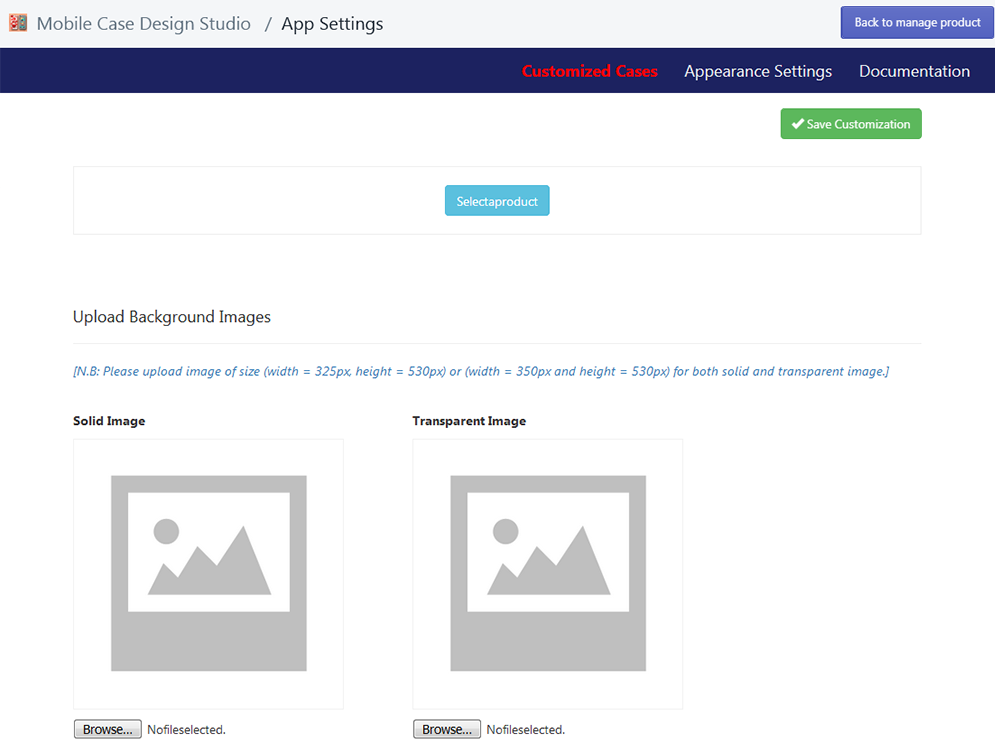
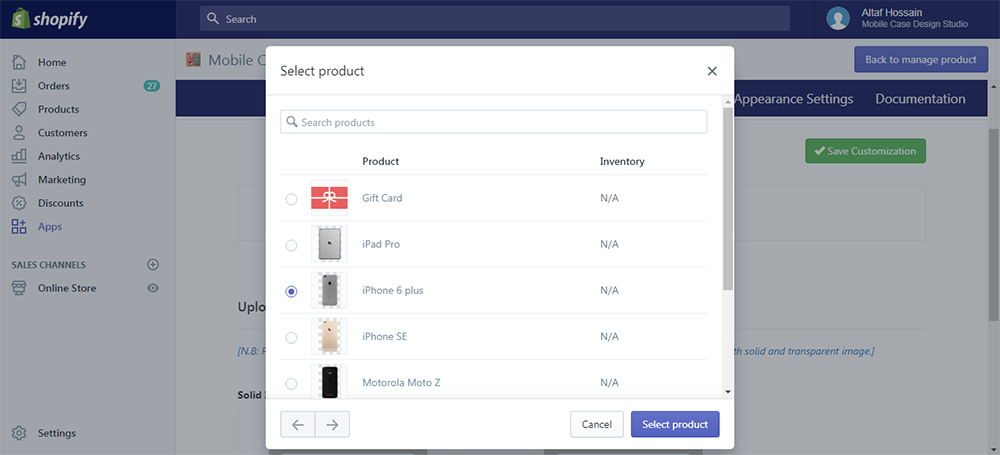
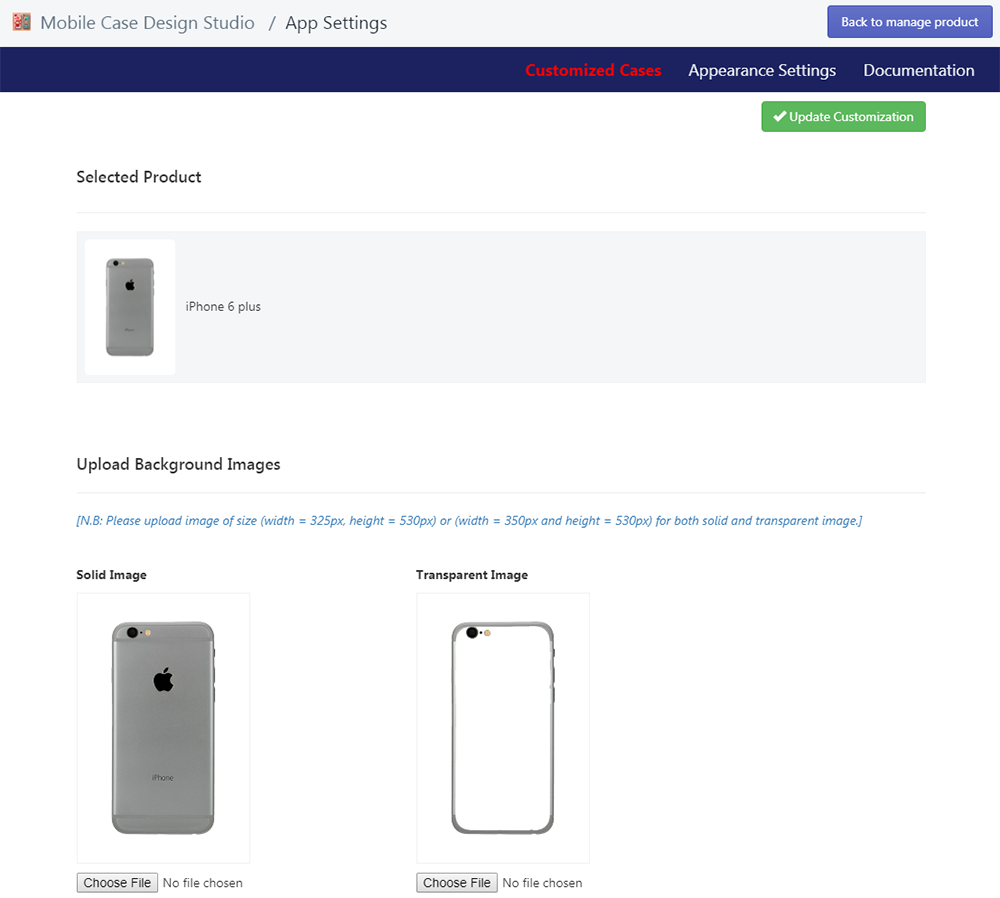
7. Now go to Customized Cases link and click on Create Customized Case link. Here you should Select a product and Upload solid and transparent image of mobile case. You should upload image of size (width = 325px, height = 530px) or (width = 350px and height = 530px) for both solid and transparent image [ The portion you want to design, it should be transparent ]. Then click on Save the customization button.
8. Click on next tab Appearance Settings to customize your settings. Advanced user can add Custom CSS from here. Insert your Instagram API Client ID* and Facebook APP ID** to show the upload option in frontend.
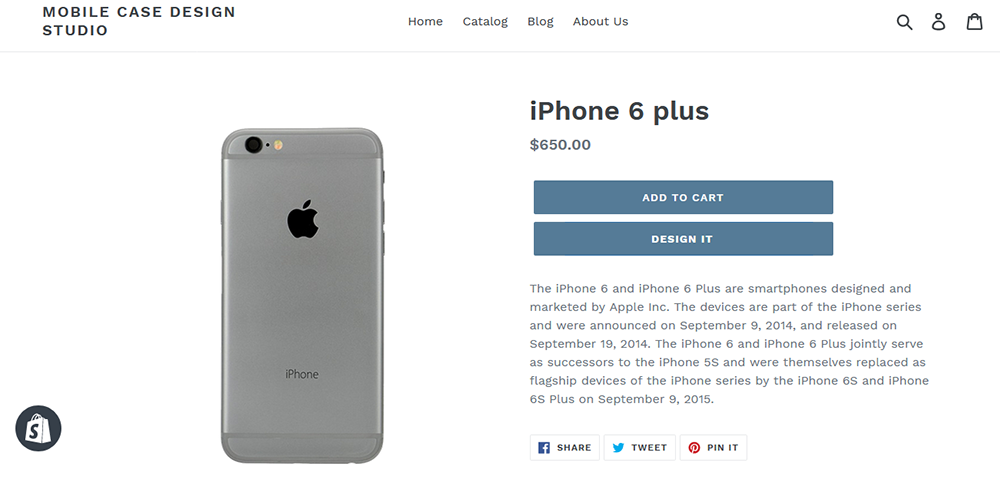
9. Now go to frontend and in a product details page you will find a Design It button just click on it and start design.
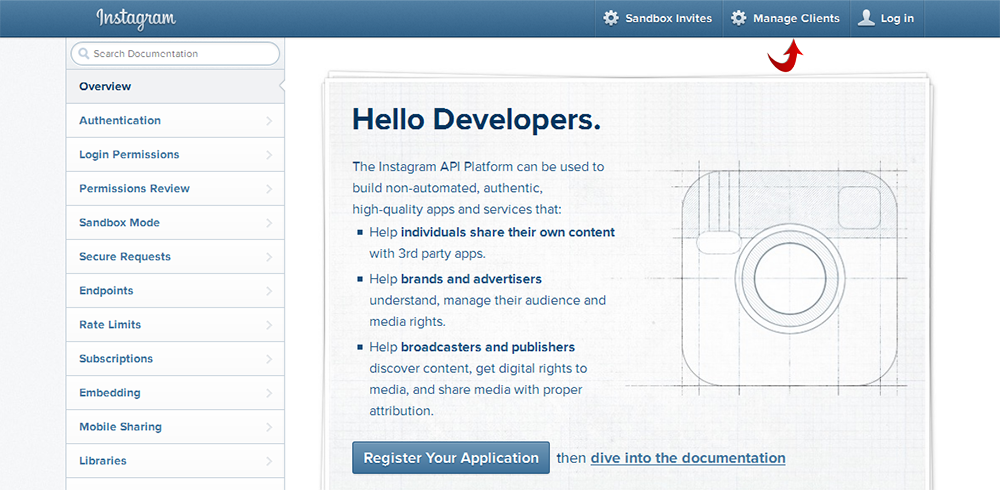
How to get Instagram API Client ID*
- Login to your Instagram ID.
- Hit the URL https://www.instagram.com/developer/
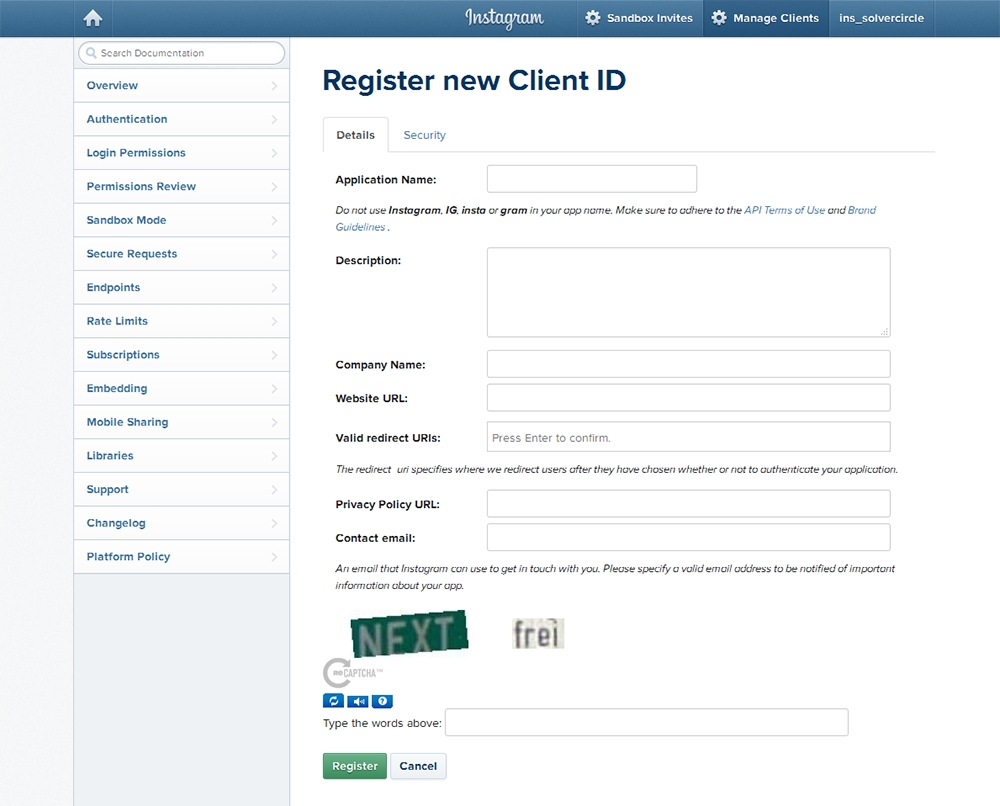
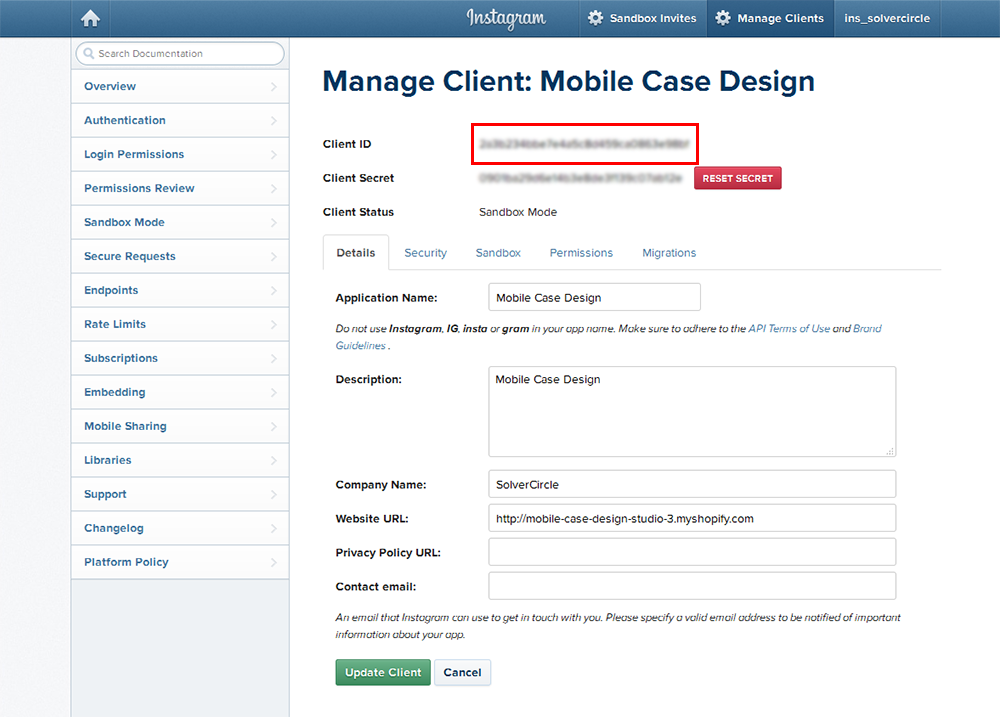
- Now click on the “Manage Clients” link and you will find “Register a New Client” link. Just click on it and insert your necessary info.
- After complete your registration you will find the “Client ID”.
- Now insert this ID in our Apps > Appearance Settings > Instagram API Client ID section of shopify dashboard.

How to get Facebook APP ID**
- Login to your Facebook ID.
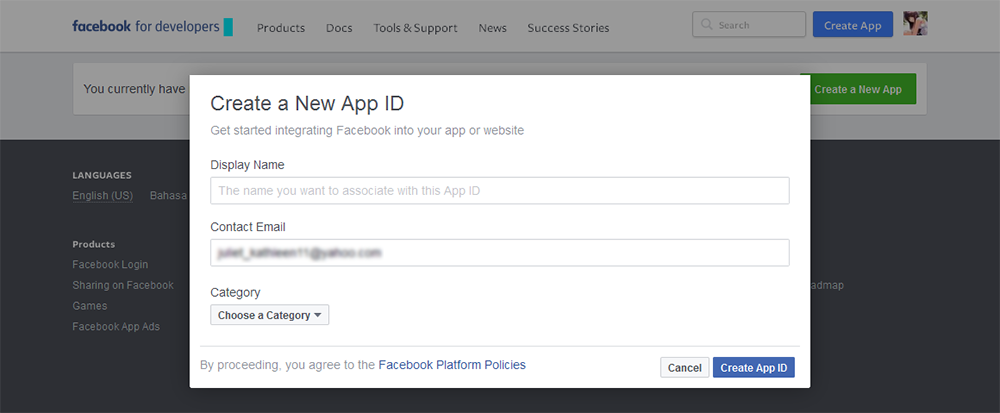
- Hit the URL https://developers.facebook.com/apps/. Click on the “Register” button to insert your necessary info then click to “Register” button.
- After register you will find “Create App” button, now insert “Display Name”, “Contact Email” and choose a “Category” then click on to “Create App ID” button (You must complete the captcha also).
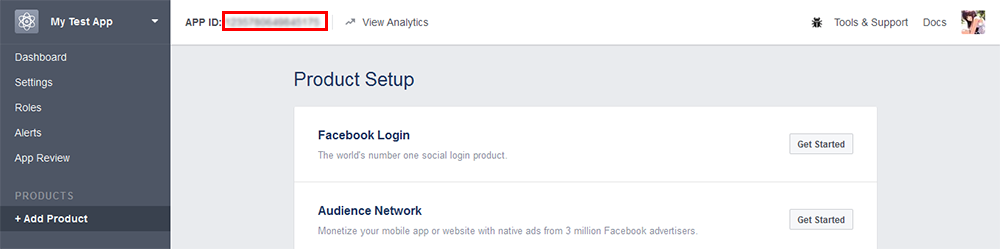
- After “Create App” you will find the “App ID” in top left corner. Just click on it and it will automatically copy.
- Now paste/insert this ID in our Apps > Appearance Settings > Facebook APP ID section of shopify dashboard.


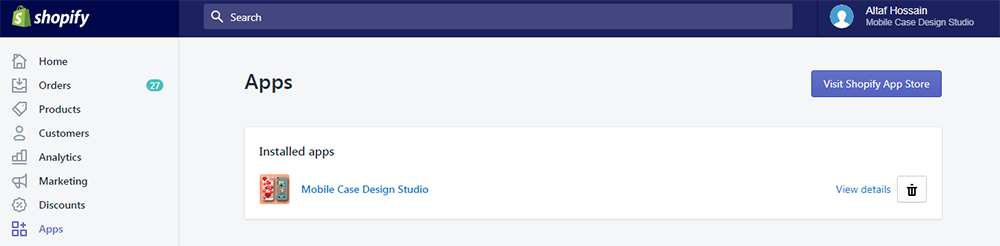
Admin - Installed App
Admin - Create Customized Case
Admin - Select a Product
Admin - Edit Customized Case
Admin - Customized Cases
Admin - Appearance Settings

Admin - Order Steps
Front - "Design It" Button
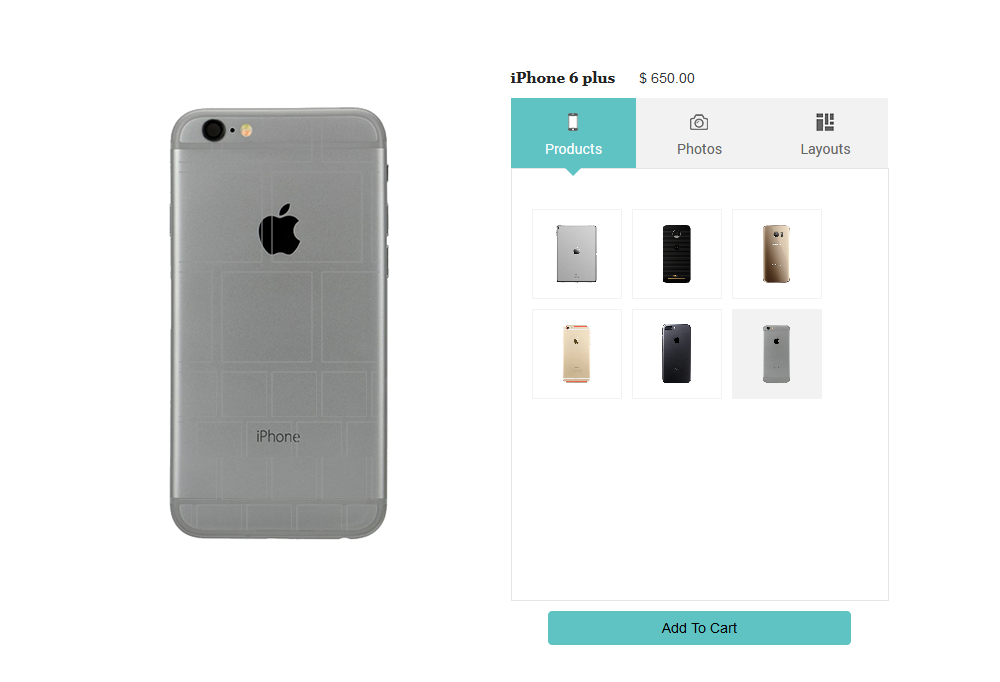
Front - Choose Product
Front - Image Upload
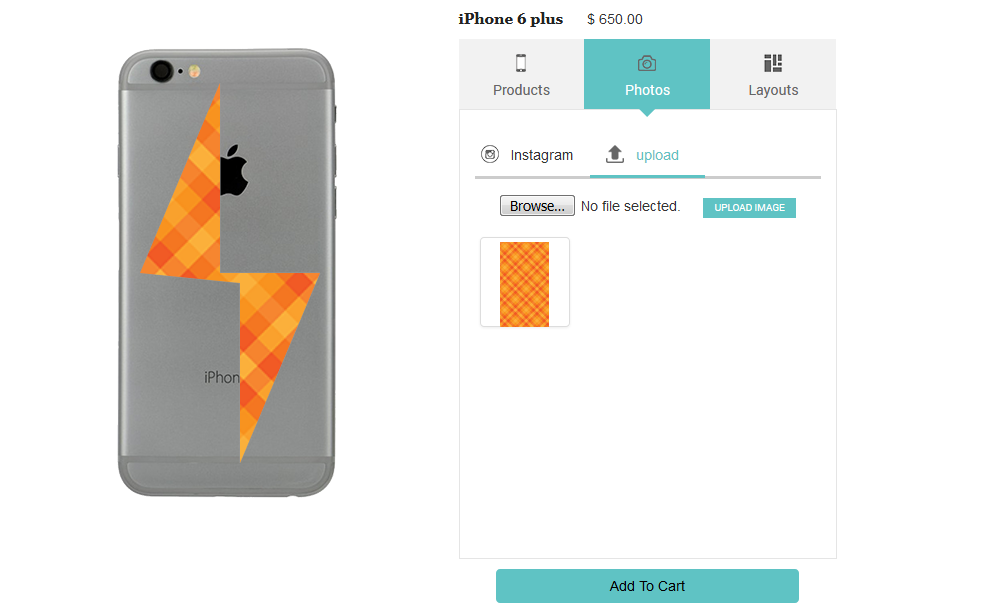
Front - Image Upload from Device
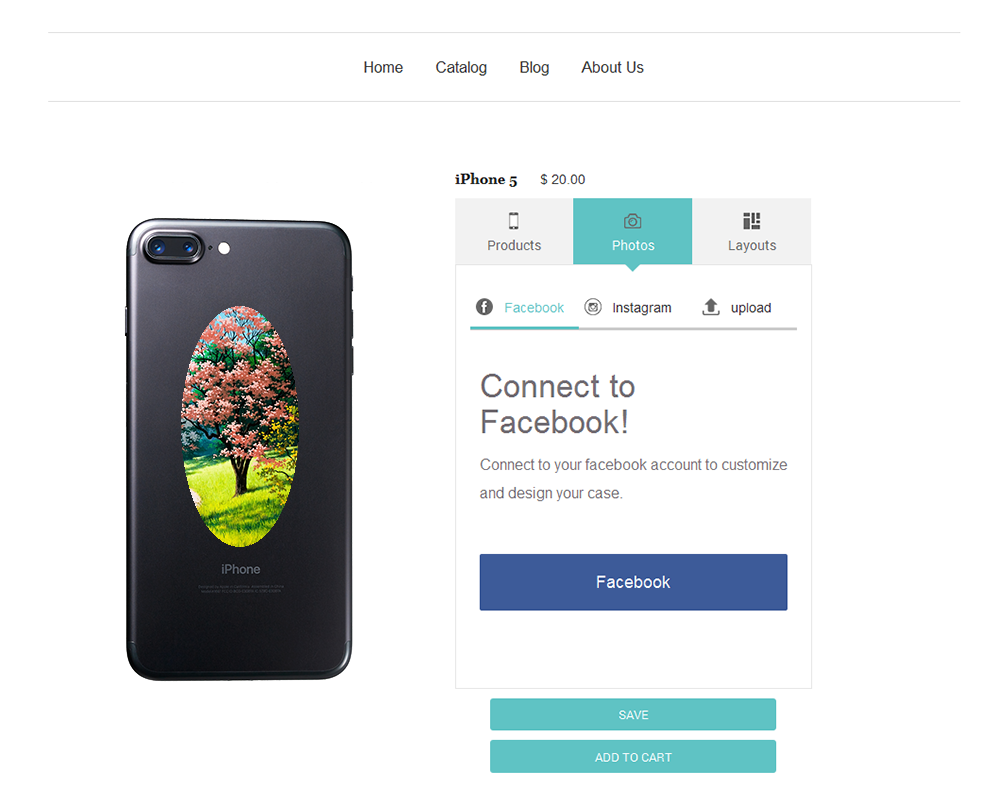
Front - Image Upload from Facebook
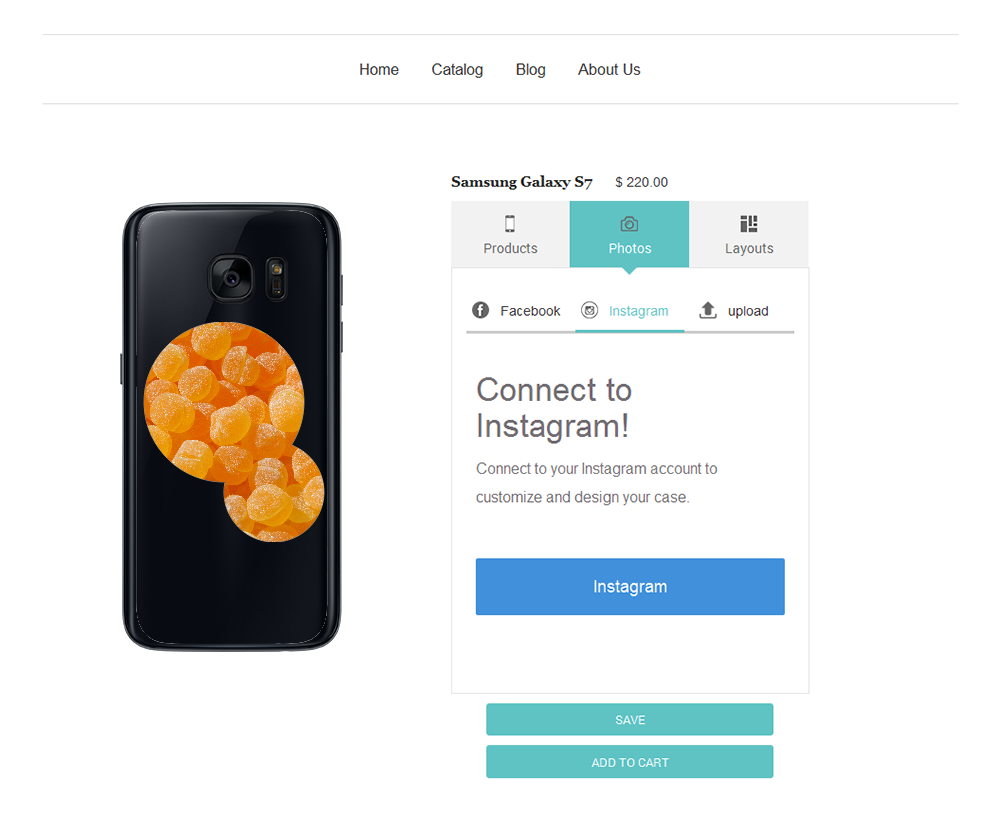
Front - Image Upload from Instagram
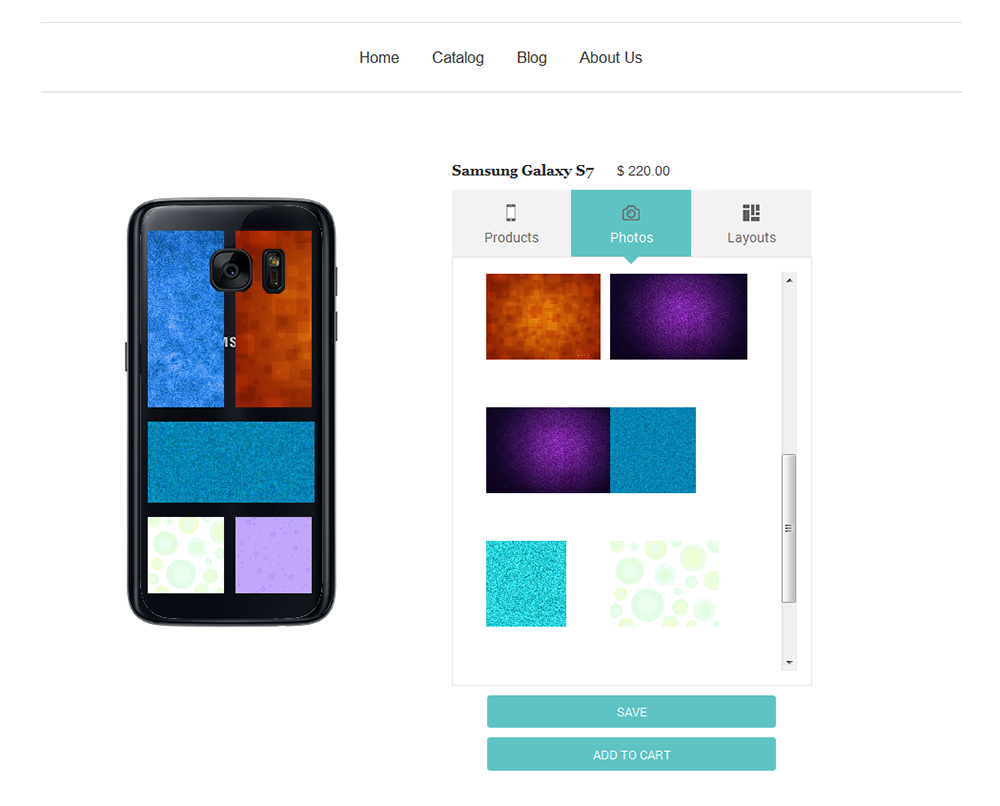
Front - Layouts
Front - Cart Page
Front - Sample Design 1
Front - Sample Design 2
Front - Sample Design 3