Shopify Custom Sunglass Designer
Thank you for purchasing our amazing "Shopify Custom Sunglass Designer" Apps. If you have any questions that are beyond the scope of this help file, please feel free to email via our user page contact form to get everything you need. Thank you so much!
“Shopify Custom Sunglass Designer” is a shopify app which is used to easily design or customized sunglass through online.
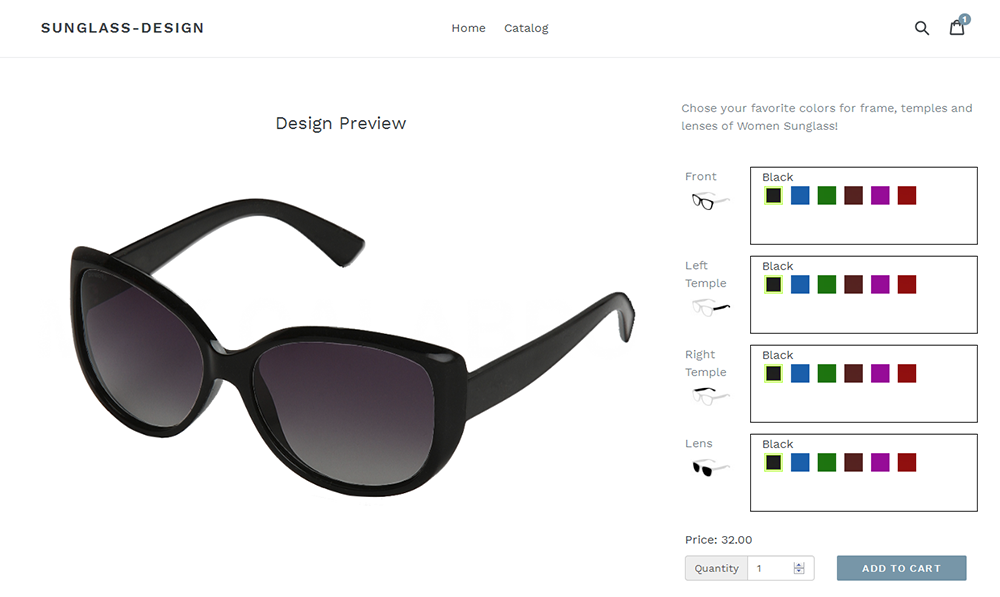
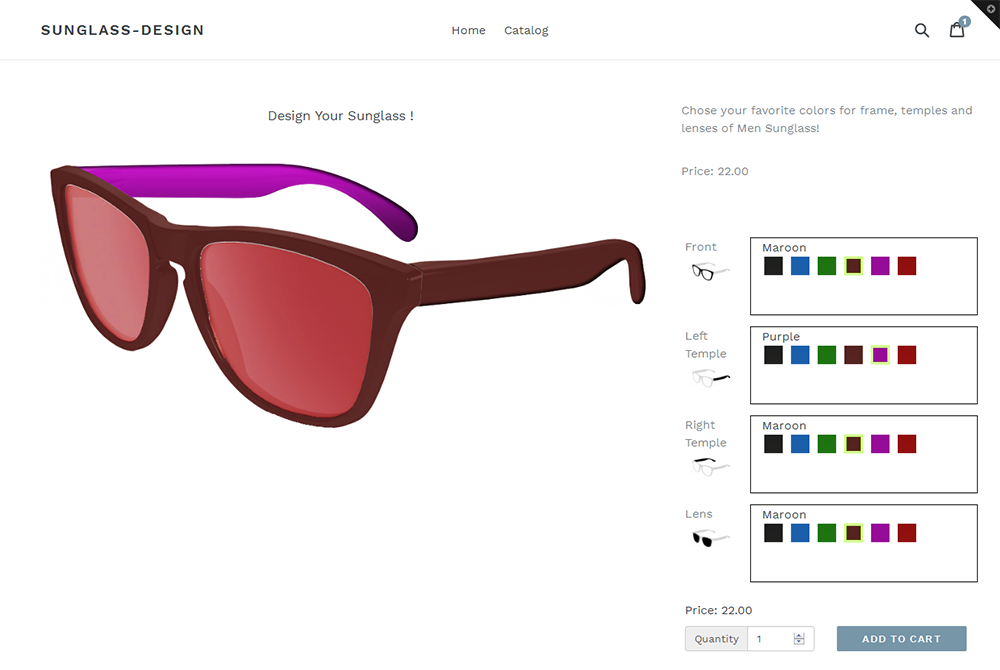
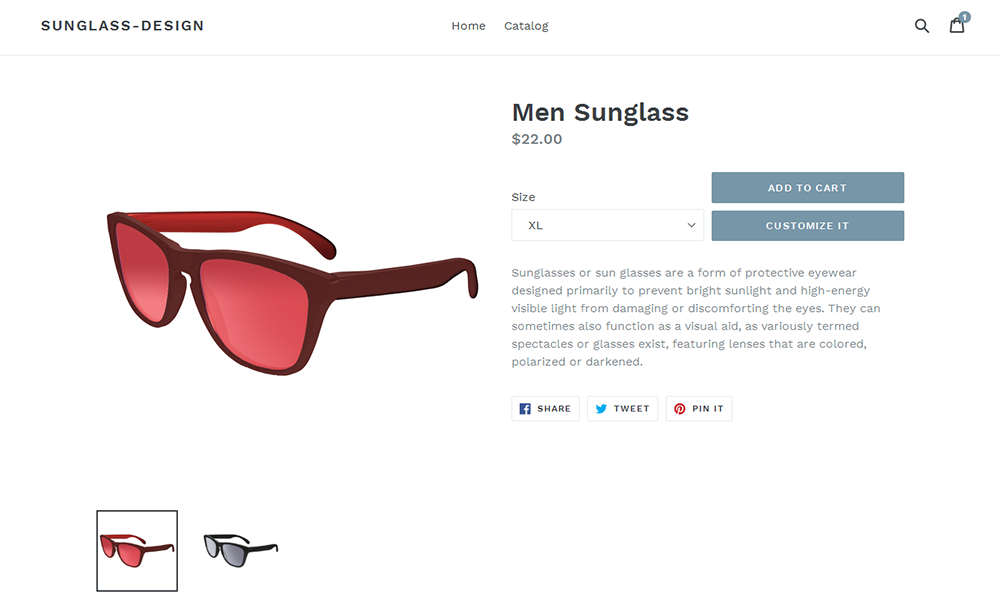
Customers are instantly able to design their own sunglass and this is easy way to design from online. Just click a button and select their preferred frames, lenses or glass.
By this powerful app customer can design the sunglass as per their need such as choose front frame, left temple, right temple and lens or glass. Shoppers can “Add to Cart” the sunglass with quantity from design panel.
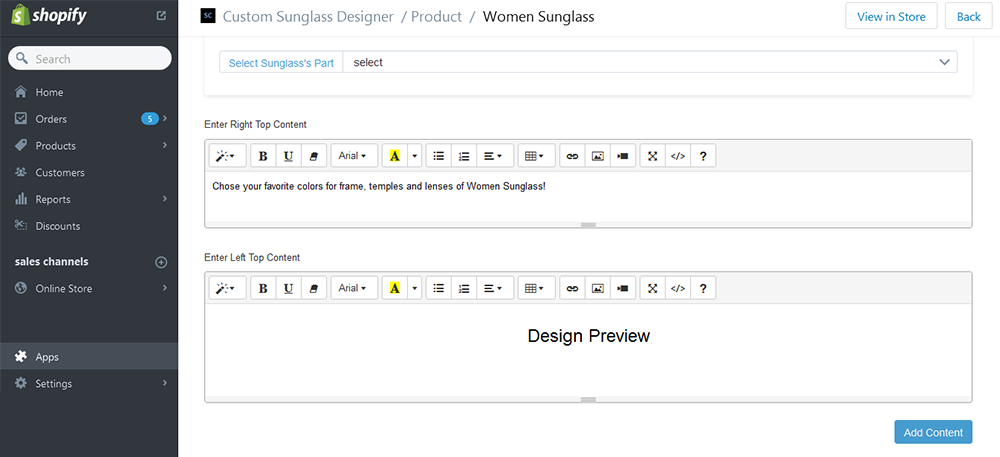
“Shopify Custom Sunglass Designer” app has some excellent features and easy to setup. This app is more flexible and compatible with many existing apps in the Shopify repository. This app is fully customizable. Users can easily configure the app into the new or existing shopify store.
- Shoppers can choose their preferred lenses and frames.
- Just click on “Design It” button and start design.
- Shoppers can add to cart the product from here.
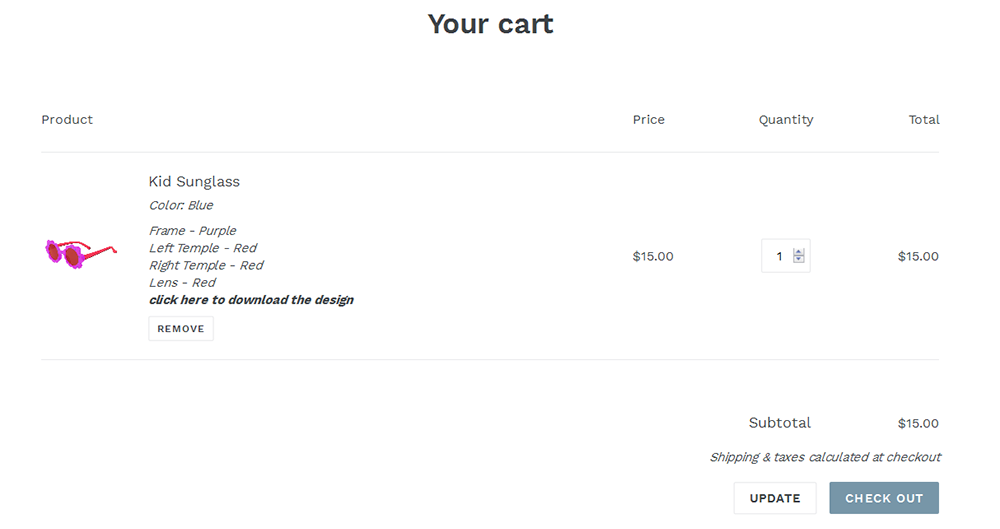
- Shoppers can view the “Preview Design Image” from cart page.
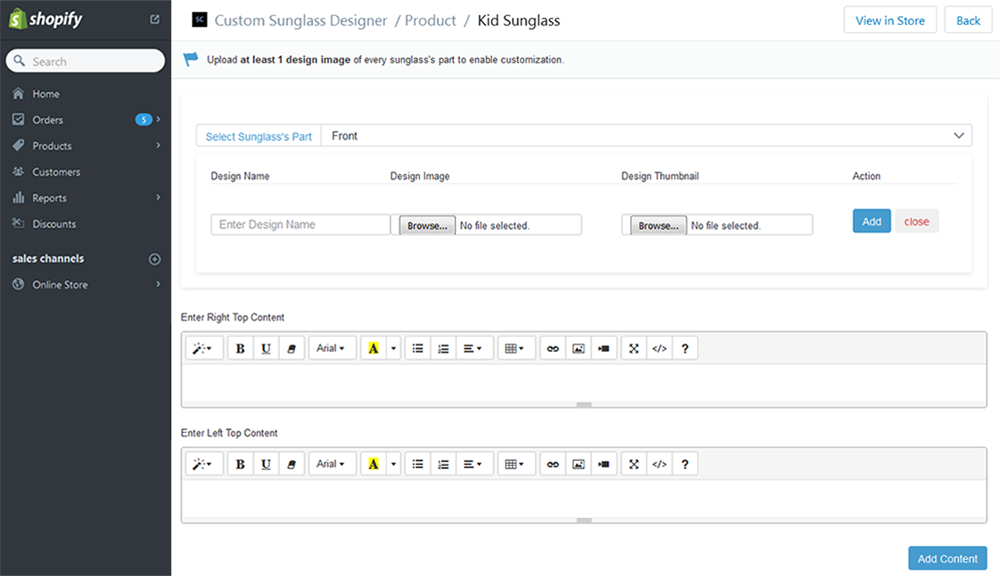
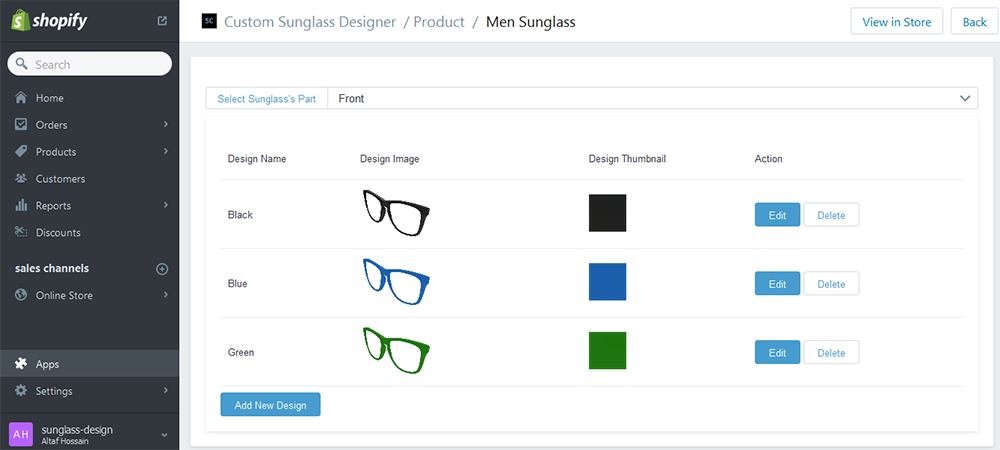
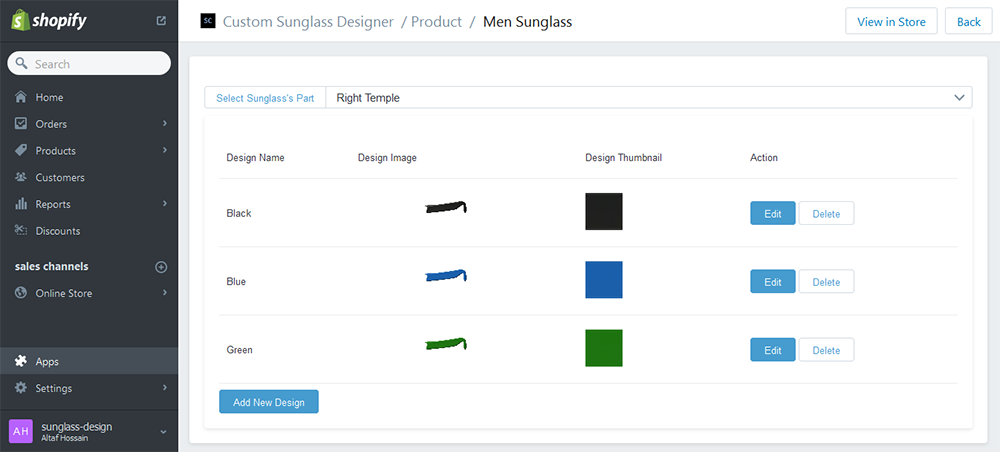
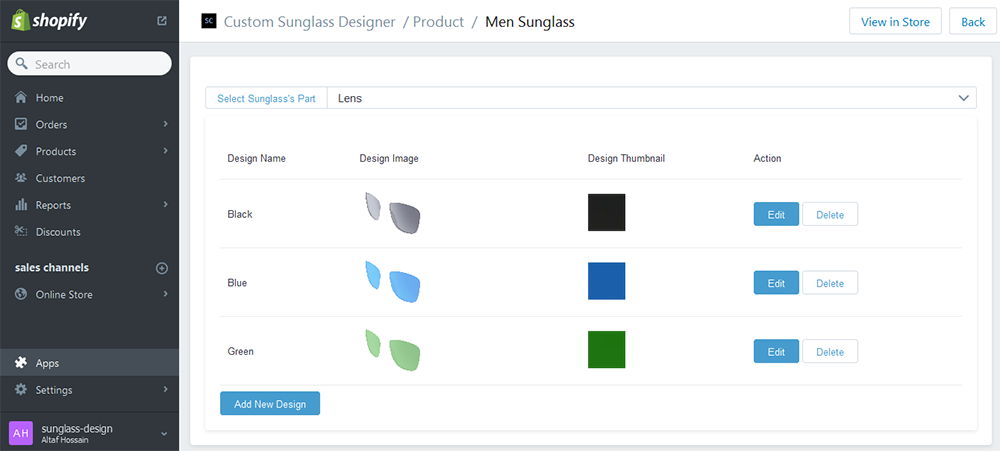
- Shop owner can upload frame, lens as well as design thumbnails from apps admin.
- Shop owner can enable, disable or delete customization for specific product.
This app requires few theme liquid file changes. The changes depend on theme liquid codes. If you understand liquid logic / codes then follow the steps given below and let us know if you face any problems. Otherwise add install@solvercircle.com as a staff member of your store (If you don't know how to add "staff member" then click here) and email us at install@solvercircle.com, then we will install the codes for you.
1. Login your Shopify Store in Admin panel.
2. Now hit our Apps URL and click on to "Get App" button.
For show this application in your theme, you should add some code in your template. So total process is given below.
3. Go to “Themes” menu of Admin Dashboard and Edit your published themes to install the application.
4. Click on “Template Editor” and put the Shopify Business Card Design Application “Code” on the following files. (Update this template files: product-template.liquid and cart.liquid/cart-template.liquid)
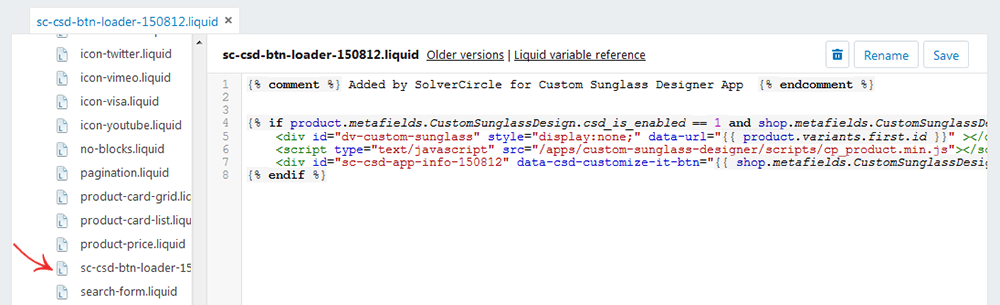
Step 1: At first Create/Add a new snippet with named “sc-csd-btn-loader-150812.liquid” at Snippets folder of theme editor. Now just put the following code.
{% comment %} Added by SolverCircle for Custom Sunglass Designer App  {% endcomment %}

{% if product.metafields.CustomSunglassDesign.csd_is_enabled == 1 and shop.metafields.CustomSunglassDesign.csd_customize_it_btn %}
    <div id="dv-custom-sunglass" style="display:none;" data-url="{{ product.variants.first.id }}" ></div>
    <script type="text/javascript" src="/apps/custom-sunglass-designer/scripts/cp_product.min.js"></script>
    <div id="sc-csd-app-info-150812" data-csd-customize-it-btn="{{ shop.metafields.CustomSunglassDesign.csd_customize_it_btn }}" ></div>
{% endif %}
Screenshots of theme file for the Step 1 code is given below:
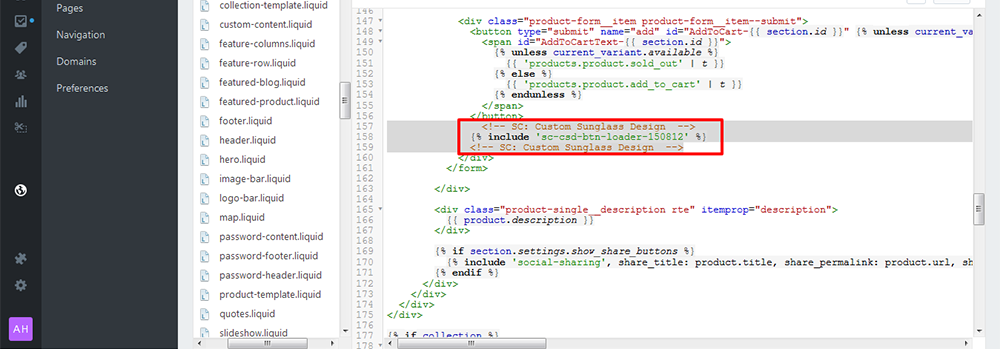
Step 2: Add the following code just after "Add to Cart" button code for product page.
<!-- SC: Custom Sunglass Design  -->
{% include 'sc-csd-btn-loader-150812' %}
<!-- SC: Custom Sunglass Design  -->
Sectioned Theme: Click here to add the above code in product-template.liquid.
Non Sectioned Theme: Click here to add the above code in product.liquid.
Screenshot of theme file for the Step 2 code is given below:
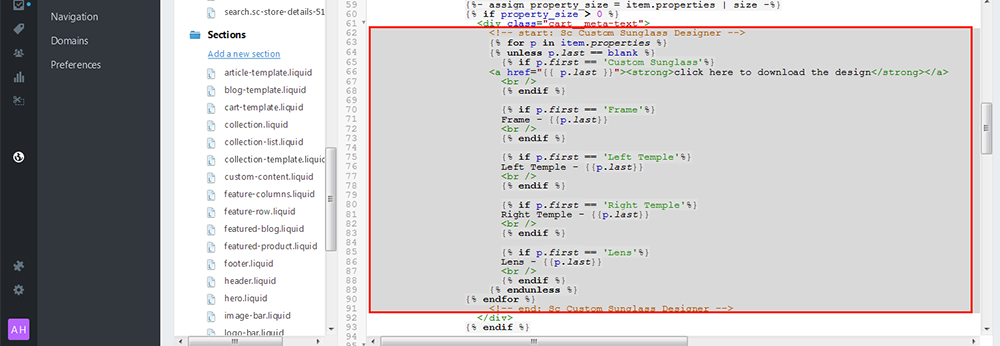
Step 3: Add the following code for cart page. These codes are for showing "Download Design" link in the cart page.
                    <!-- start: Sc Custom Sunglass Designer -->
                    {% for p in item.properties %}
                    {% unless p.last == blank %}
                      {% if p.first == 'Custom Sunglass'%}
                    <a href="{{ p.last }}"><strong>click here to download the design</strong></a>
                      <br />
                      {% endif %}

                      {% if p.first == 'Frame'%}
                      Frame - {{p.last}}
                      <br />
                      {% endif %}

                      {% if p.first == 'Left Temple'%}
                      Left Temple - {{p.last}}
                      <br />
                      {% endif %}

                      {% if p.first == 'Right Temple'%}
                      Right Temple - {{p.last}}
                      <br />
                      {% endif %}

                      {% if p.first == 'Lens'%}
                      Lens - {{p.last}}
                      <br />
                      {% endif %}
                    {% endunless %}
                {% endfor %}
                    <!-- end: Sc Custom Sunglass Designer -->
Sectioned Theme: Click here to add the above code in cart-template.liquid.
Non Sectioned Theme: Click here to add the above code in cart.liquid.
Screenshots of theme file for the Step 3 code is given below:
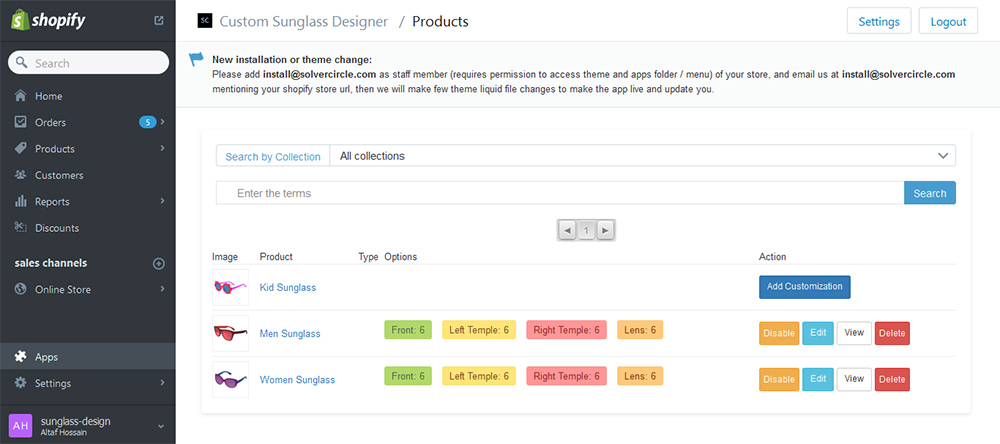
5. So your application has installed. Now go to “Apps” menu of Admin Dashboard and click on the “Custom Sunglass Designer” Apps link.
6. Now click on any sunglass product and upload the Front, Left Temple, Right Temple and Lens images.